
The V205 is a CacheDrive running in a VM under Proxmox.
Each CacheDrive virtual machine image is customized with a unique identifier. The virtual machine runs on the Proxmox Server and contains a bootable disk image.
Requirements
- Proxmox 9.2 or later
The virtual hardware requirements for the V205.
- Minimum Disk Space
V205 needs 2 disks: one is for the OS, and one is for the data store. For the OS disk, the minimum disk space is 50 GB. For the data disk, we recommend at least 500 GB per CacheDrive (1 TB preferred).
- DHCP Server
CacheDrives use DHCP to obtain an IP Address. You can reserve the IP Address once a lease is established on your DHCP server.
Recommendations
- 2 vCPU (more can be added for heavy workloads)
- 2 GB RAM. If you expect a large number of simultaneous users, we suggest 4 MB per user, with 2 GB being the minimum recommended.
- High-performance storage such as VirtIO SCSI single controller.
To begin the installation process, download the zip file provided by Morro Data and save it to a computer that has access to your Hyper-V server. The zip file contains a custom IMG file that is used as the boot disk for the Proxmox virtual machine.
There are 3 steps to installing your V205:
- Upload the IMG file extracted from the zip file to Proxmox as the image.
- Create the Virtual Machine with large enough disks for the CacheDrive.
- Add the CacheDrive to your account.
Note: Please check the settings carefully. An incorrect setting may not prevent the virtual machine from booting, but it will prevent the CacheDrive from operating properly.
1. Upload the IMG file to PVE as the image
1. Log in to your Proxmox Manager.
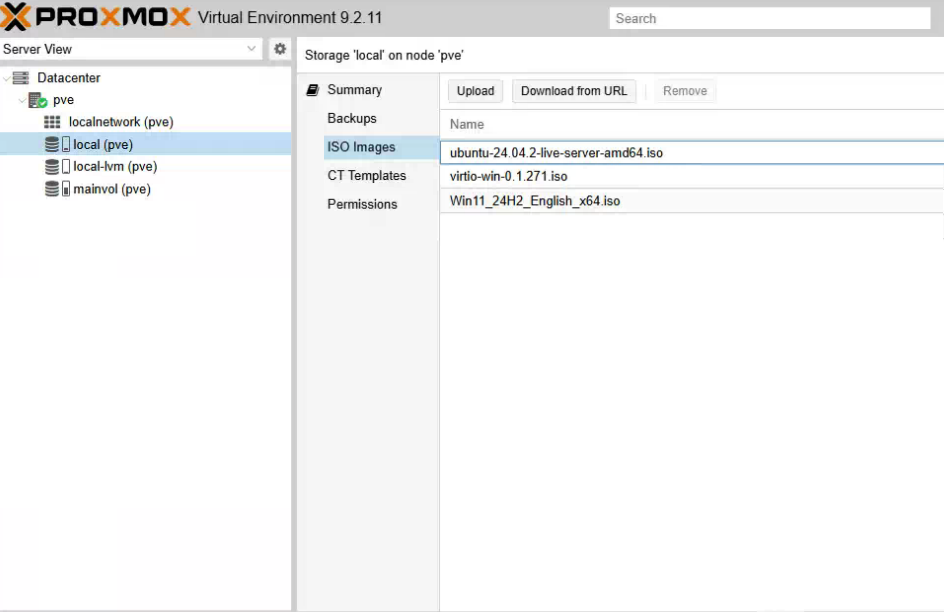
2. Click the “Upload” button on the "local (pve)" (you may have a different name for the local storage) - ISO Images page.
3. On the pop-up page, select the IMG file you saved to your computer.
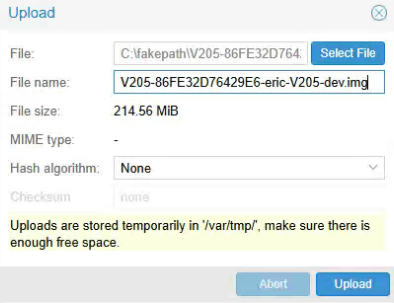
4. Click the "Upload" button to upload the IMG file to the Proxmox server.
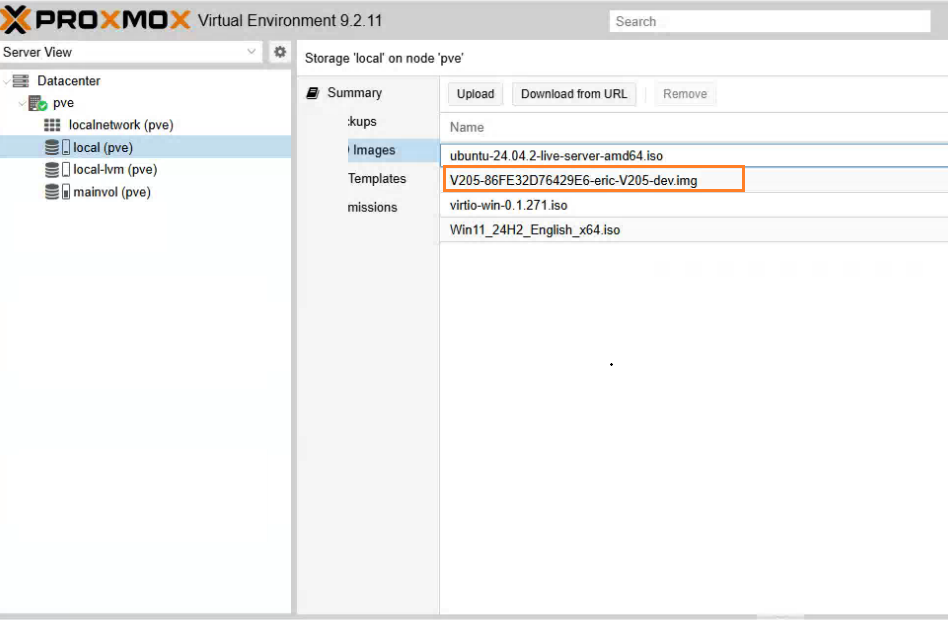
2. Create the Virtual Machine
1. Click the "Create VM" button in the upper right corner to create a virtual machine.
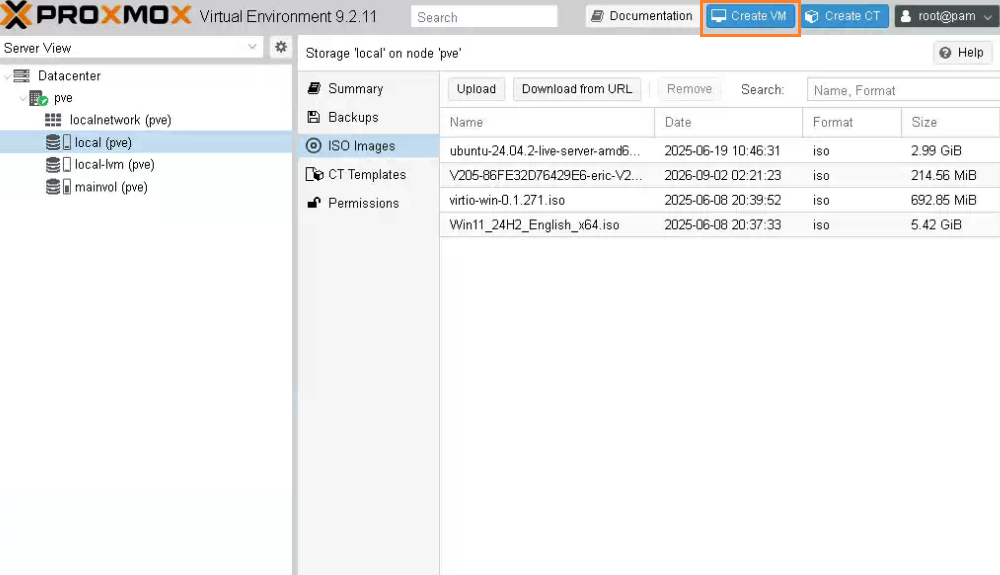
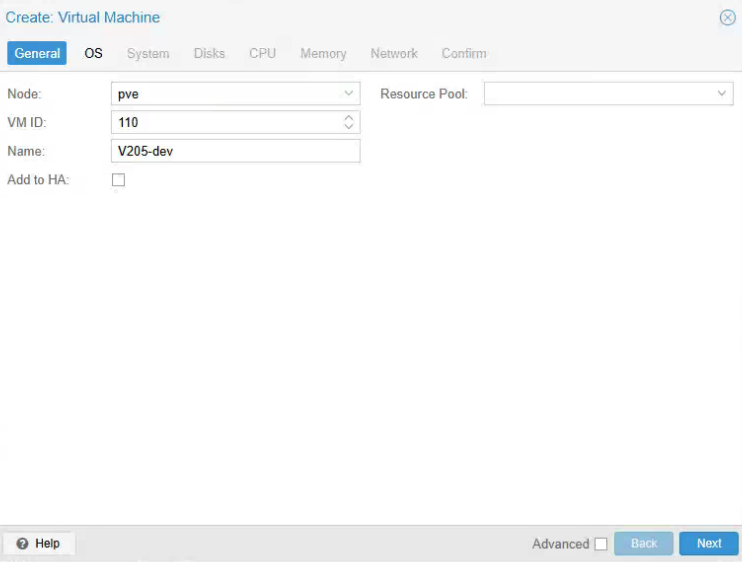
2. On the pop-up page, select the Node, specify the VM ID, and name the virtual machine.
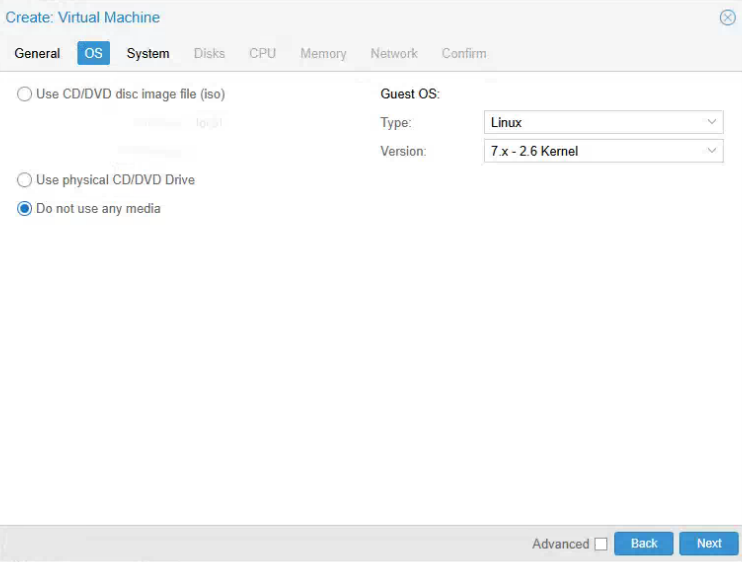
3. Select "Do not use any media" on the "OS" page.
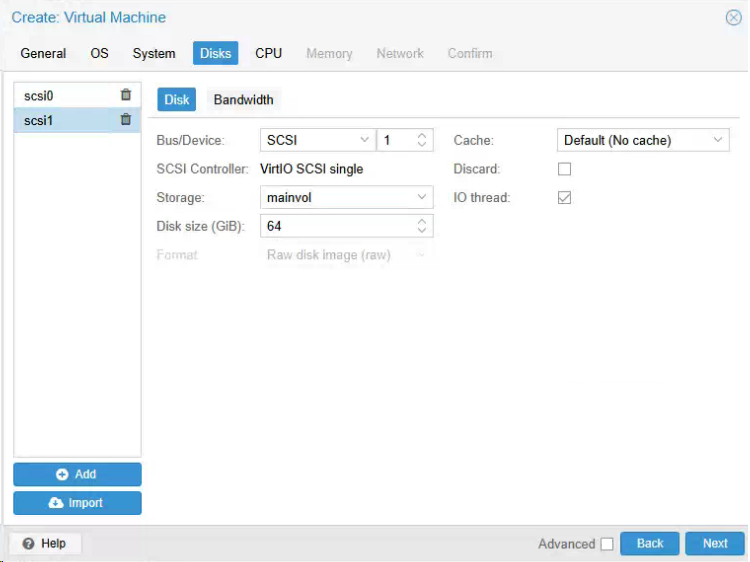
4. On the "Disks" page, add two SCSI disks with enough space. For scsi0 - OS disk, at least 50 GB. And for scsi1 - data disk, we recommend at least 500GB.
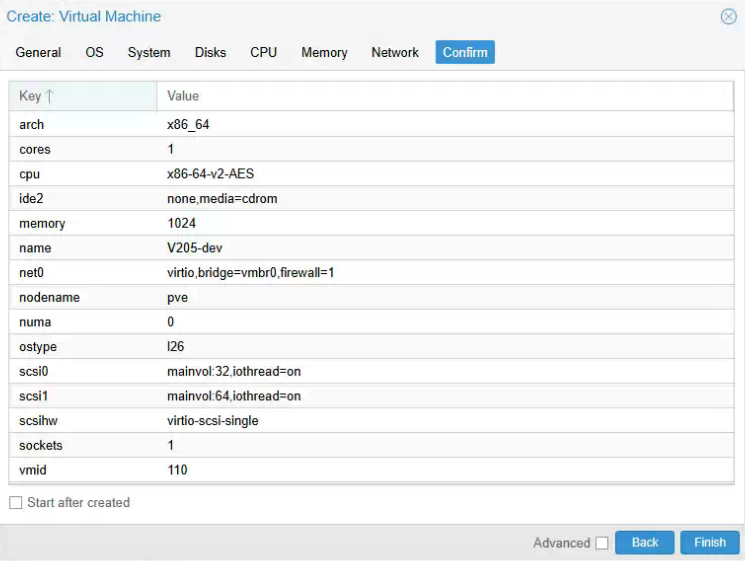
5. Configure "CPU" and "Memory" as you need (we recommend at least 2 vCPU and 2 GB RAM). Select the proper network interface on the "Network" page. Then confirm the configurations.
6. On the pve - Shell page, import the IMG file to the virtual machine.
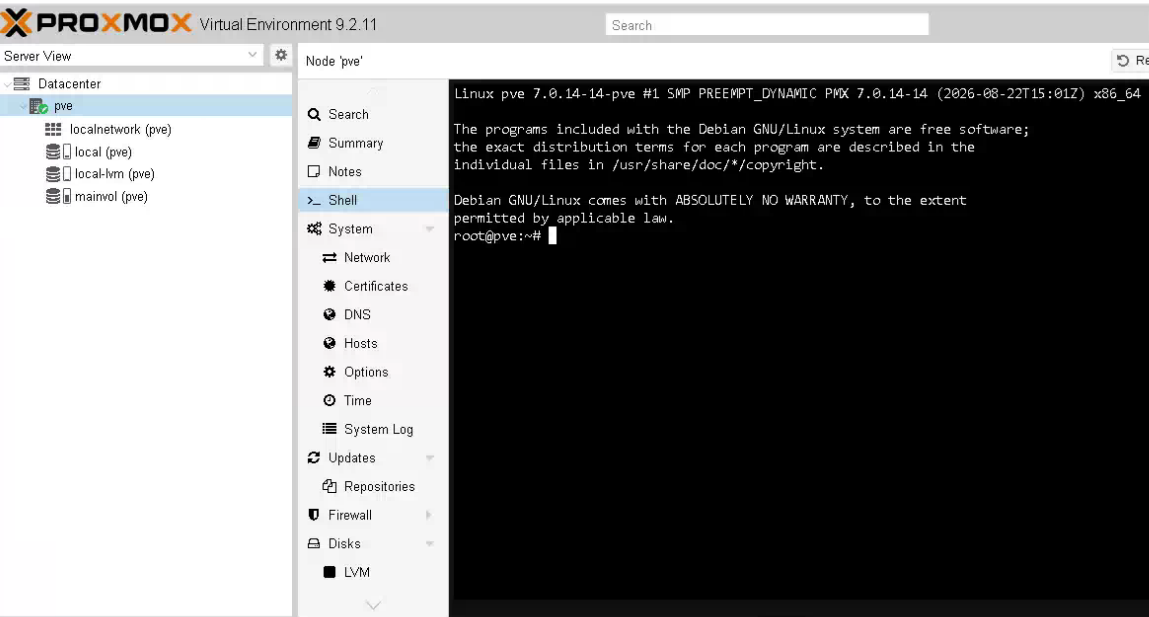
The command is as follows:
qm importdisk 111 /var/lib/vz/template/iso/V205-86FE32D76429E6-eric-V205-dev.img local-lvm
Please replace "111" with the VM ID that you set in step 2. Please replace "V205-86FE32D76429E6-eric-V205-dev.img" with the image file name you uploaded to PVE.
After the command runs successfully, you will see a message like the one below:

Then you can remove the image to save disk space with the command below:
rm /var/lib/vz/template/iso/V205-86FE32D76429E6-eric-V205-dev.img
7. On the "Hardware" page of the virtual machine, you will see 3 disks. 2 disks have been attached to the virtual machine (these 2 disks were created in step 4). And 1 disk is an unused disk (this is the disk you imported in the last step).
Detach the 2 attached disks using the "Detach" button.
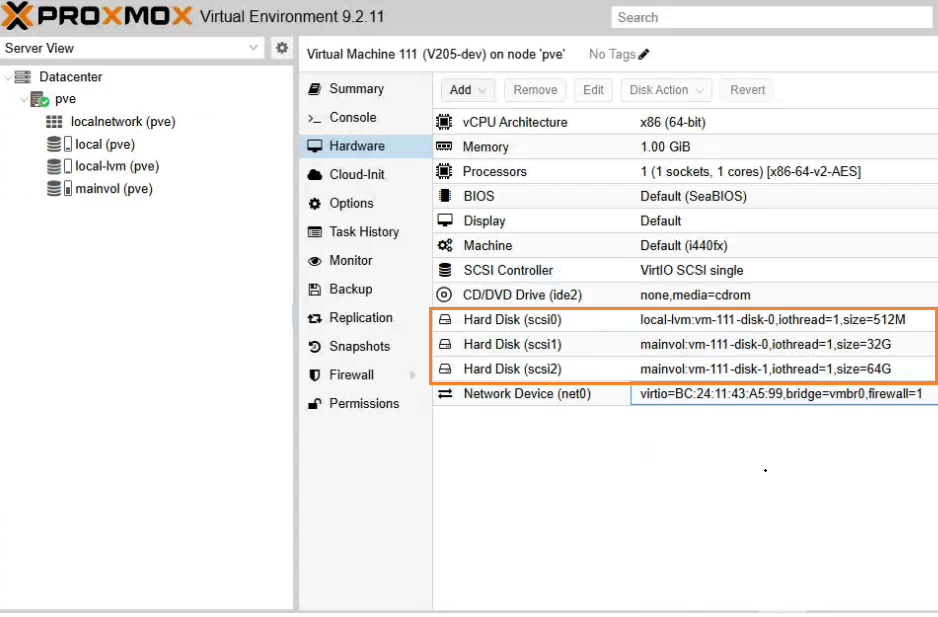
Double-click the disks one by one to attach the 3 disks again in order - the unused disk should be the first one (will be the boot media), then the previous scsi0 disk (will be the OS disk to run the operating system of the Morro CacheDrive), and then the previous scsi1 disk (will be the data disk to store files).
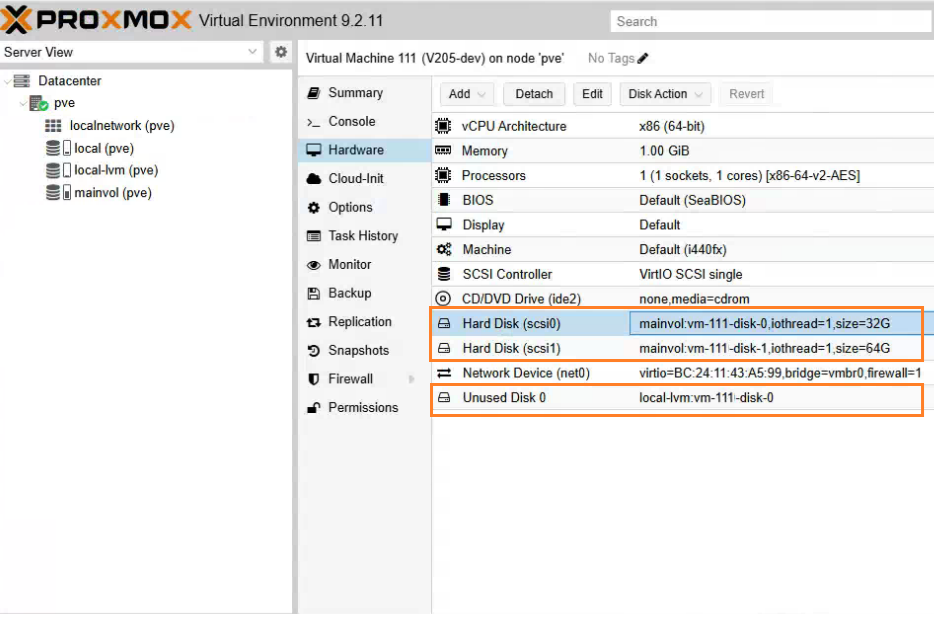
After 3 disks have been attached to the virtual machine again, you will see the disks like below:
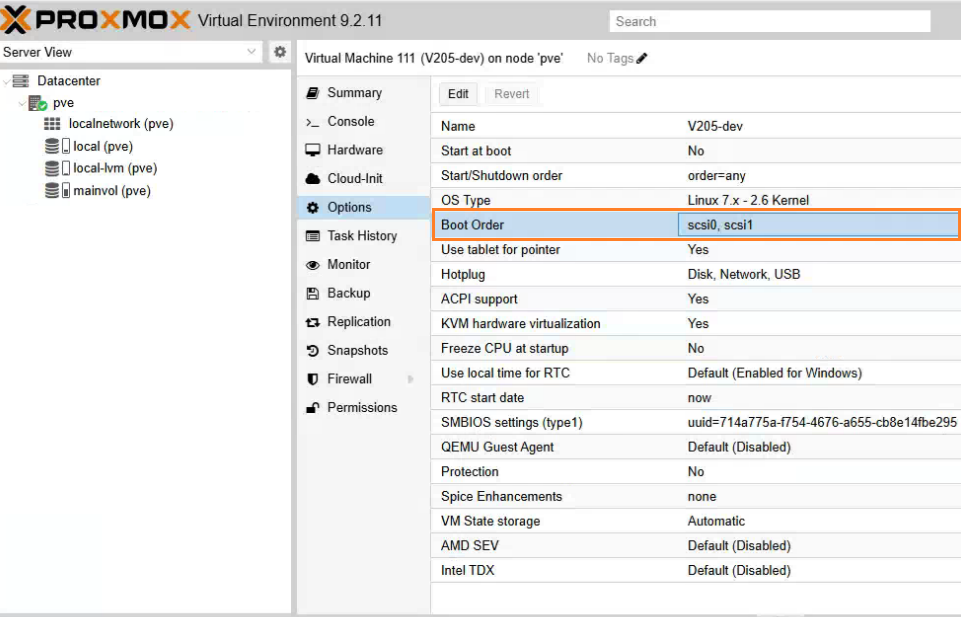
8. Adjust the boot order of the disks on the "Options" page: scsi0 (boot media), then scsi1 (OS disk).
9. Optional: you can delete the CDROM from the "Hardware" page if you want.
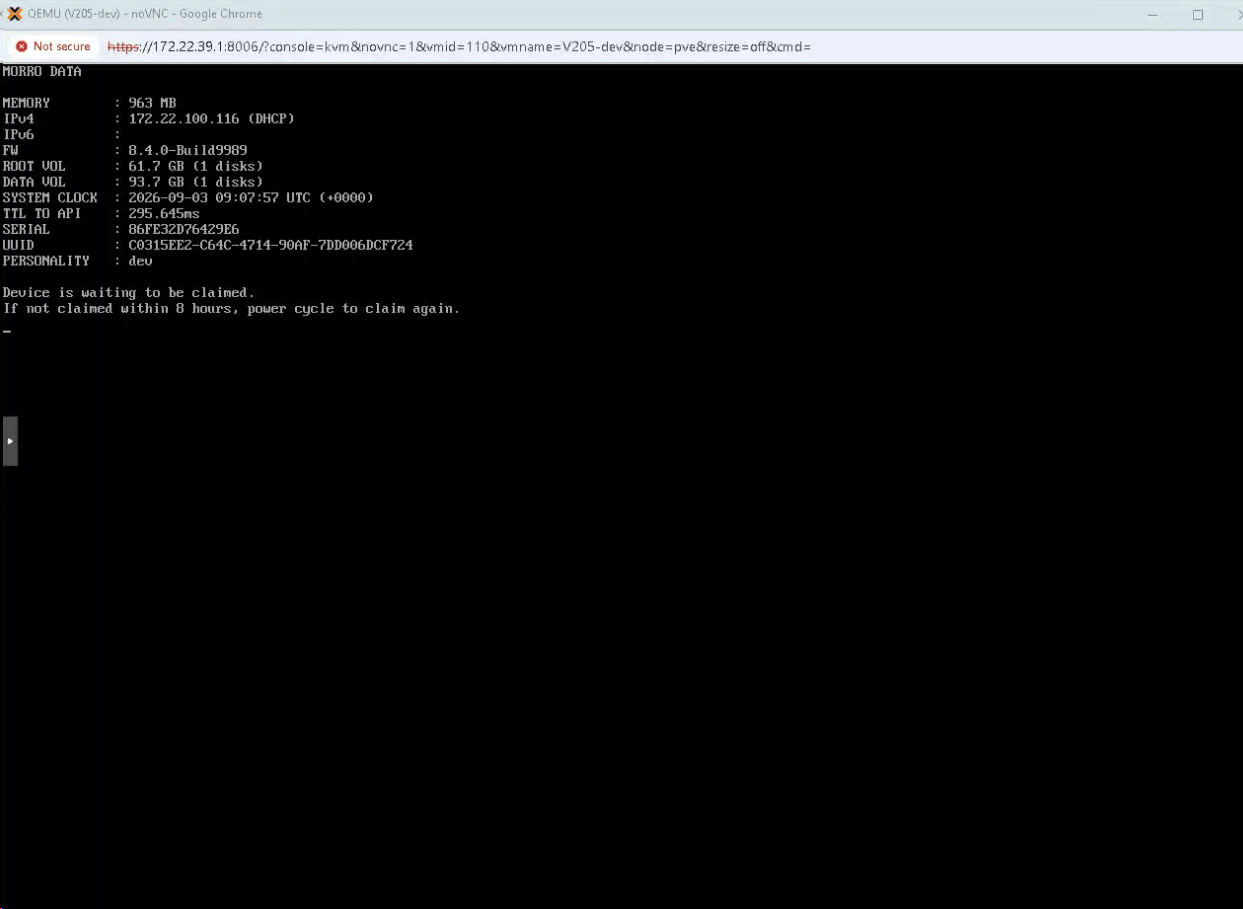
10. Start the virtual machine. It will install the OS to scsi1 and reboot automatically. Please monitor the "Console" page and wait for the device to be claimable:
3. Add the CacheDrive to Your Account
There are two ways to add your CacheDrive to your account:
- Add a CacheDrive to a new account
- Add a CacheDrive to an existing account
Add a CacheDrive to a New Account
For information on how to add a CacheDrive to a new account, please refer to the article Morro Account Sign Up.
Add a CacheDrive to an Existing Account
For information on how to add a CacheDrive to an existing account, please refer to the article Add Gateway (CacheDrive).
FAQ
How do I expand the hard drive on my VM (V200/V201/V202/V203/V205)?
My CacheDrive won't boot or is offline. What should I do?